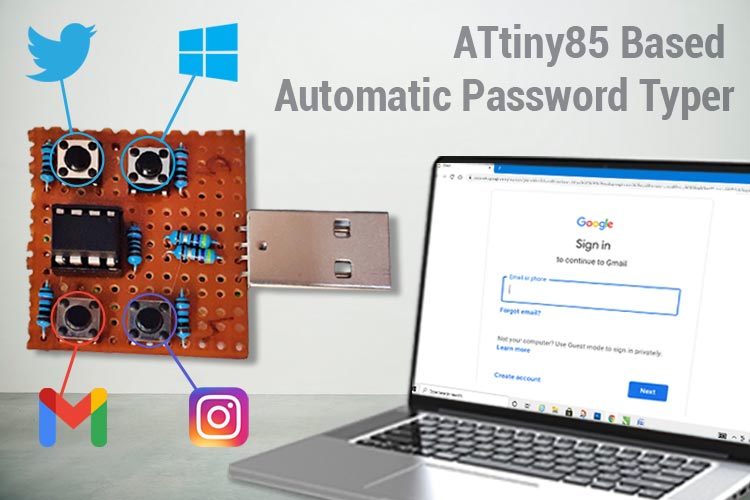
Are you fed up with manually logging in to your windows or social media accounts? Wouldn’t it be nice to have a pocket-sized device which when connected to a computer would automatically login into all your accounts?
Well probably, you already know about hardware security keys available in the market, but they are not cheap. Furthermore, as far as I know, a software solution to turn your regular thumb drive is not free. So, what is the solution? Well, it is the Attiny85 microcontroller IC with Digispark bootloader. In today’s tutorial, we are going to build an Automatic login system using ATtiny85 and some push buttons. Using this, you can directly log in to your windows or social media account or any other site by just pressing a button. You can also scale up this project by replacing the push buttons with a fingerprint sensor or RFID cards to add more security to the device. You can also check out the RFID based automatic windows login project if you are looking for something similar.
Components Required for Automatic Login System
- ATtiny85 IC
- USB A-type Plug Male
- 3 Resistors (2×47Ω & 1×1 KΩ)
- 1×IN5819 Diode
- 8-Pin IC Base
- 4× Push Buttons
- 4× 10KΩ Resistors (Pull-Up Resistors)
- Perf Board
- Connecting Wires
Automatic Login System Circuit Diagram
The schematic for ATtiny85 Automatic Login System using Push Button is given below:
The above circuit can be divided into two parts. The first one is USB, and the second one is Push Buttons. Data pins of USB are connected to PB3 and PB4 of ATtiny85 through 47-ohm resistors. R1 is a pull-up resistor that is connected between Vcc and PB3 pins of IC. Three push buttons are connected to PB0, PB1, PB2 pins of ATtiny85. All three push buttons are pulled high using 10K pull-up resistors.
Note: It is necessary to upload a boot-loader on ATtiny85 to program it using the USB. So follow our previous tutorial on How to Program ATtiny85 IC through USB.
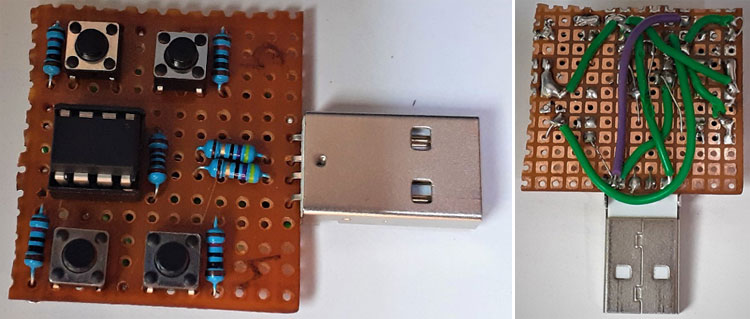
After soldering all the components on the perf board, it will look something like below:
Installing Digispark Drivers
To program the ATtiny85 using USB you must have Digispark Drivers installed on your laptop, if you don’t have them you can download them using the link given above. Then, extract the zip file and double-click on the “DPinst64.exe” application to install the drivers. If you are a newbie to ATtiny85 then follow our previous guides on How to Program ATtiny85 with Arduino and How to upload a Bootloader on ATtiny85.
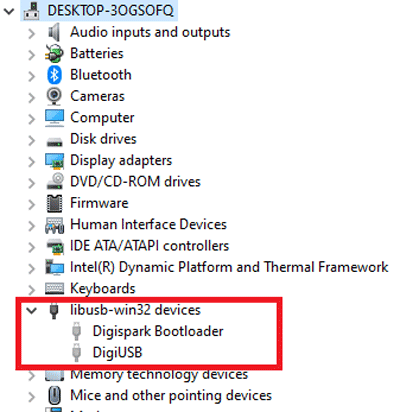
Once the drivers are successfully installed, Plug in your ATtiny85 board to the laptop. Now go to Device Manager on your Windows and your device will be listed under “libusb-win32 devices” as “Digispark Boot-loader”. If you can’t find ‘libusb-win32 devices’ on device manager, then go to View and click on ‘Show hidden Devices.’
Setting up Arduino IDE for Attiny85
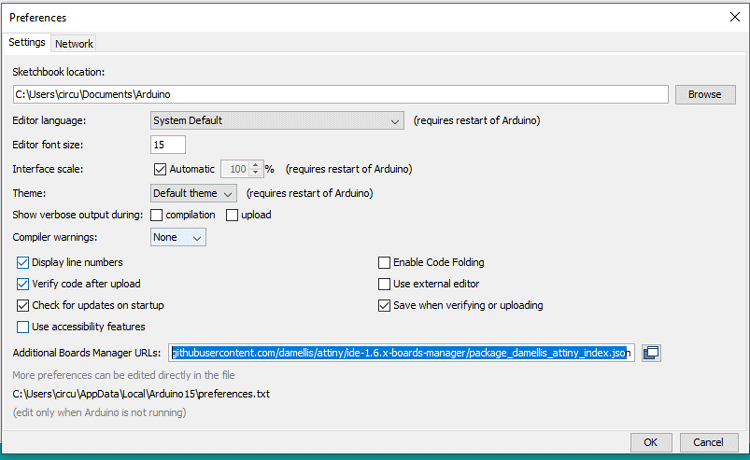
To program the ATtiny85 Board with Arduino IDE, first, we need to add the Digispark board Support to Arduino IDE. For that go to File > Preferences and add the below link in the Additional Boards Manager URLs and click ‘OK.’
http://digistump.com/package_digistump_index.json
After that, go to Tools > Board > Board Manager and search for ‘Digistump AVR’ and install the latest version.
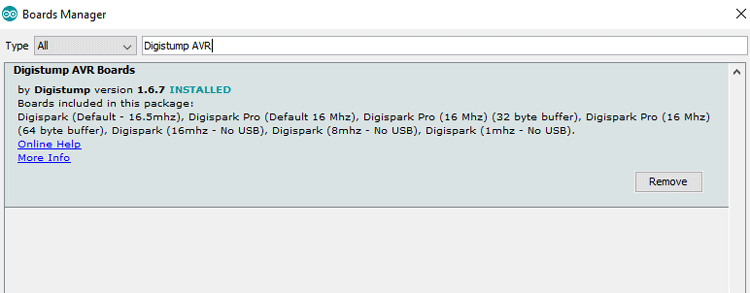
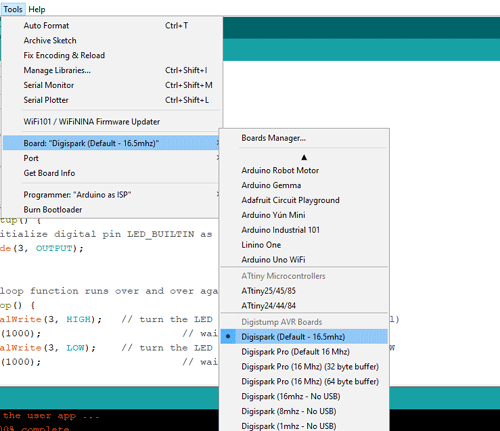
After installing it now you would be able to see a new entry in the Board menu titled 'Digispark'.
Programming ATtiny85 for Automatic Login System
After installing the drivers and setting up the Arduino IDE, now we are going to program the ATtiny85 to log in to Facebook, Twitter, and Gmail using push buttons. The complete code is given at the end of the document; here we are explaining some important commands of the code.
So, start the code by including the ‘DigiKeyboard.h’ library. The DigiKeyboard library enables the ATtiny85 to send keystrokes to an attached computer through their micro’s native USB port.
#include "DigiKeyboard.h"
Then define the ATtiny85 IC pins where push buttons are connected. Here we named these buttons Facebook, Windows, and Gmail as these push buttons will be used to login to Facebook, Windows, and Gmail.
const int facebook = 2;
const int twitter = 1;
const int gmail = 0;
Inside the setup function, define all three push button pins as inputs. Here we haven’t initialized the Serial monitor as DigiSpark does not support the serial monitor window. So instead of using Serial.print() we will DigiKeyboard.print() for debugging.
void setup() {
  pinMode (facebook, INPUT);
  pinMode (twitter, INPUT);
  pinMode (gmail, INPUT);
}
Now in void loop() we first read the button states using digitalRead() and then call upon the buttons() function to check if a push button is in a low state.
void loop() {
  fac_state  = digitalRead(facebook);
  twit_state  = digitalRead(twitter);
  gmail_state = digitalRead(gmail);
  buttons();
}
After reading the button state we will move to the buttons() function. This is the function where we issue commands to log in to different platforms. Here we have three different conditions for three push buttons. So if the push button connected to PB2 of ATtiny85 is Low then it sends all the keystrokes that are used to login to Facebook.
if (fac_state == LOW){
  DigiKeyboard.delay(2000);
  DigiKeyboard.sendKeyStroke(0);
  DigiKeyboard.sendKeyStroke(KEY_R, MOD_GUI_LEFT);
  DigiKeyboard.delay(600);
  DigiKeyboard.print("https://www.facebook.com/login/device-based/regular/login/?login_attempt=1");
  DigiKeyboard.sendKeyStroke(KEY_ENTER);
  DigiKeyboard.delay(5000);
  DigiKeyboard.print("Your Password");
  DigiKeyboard.sendKeyStroke(KEY_ENTER);
  DigiKeyboard.delay(5000);
  }
A similar process is followed for Gmail and Windows.
Testing our Automatic Log in Device
Once you have done with Hardware and code, now what is left to do is upload the code on ATtiny85. So, plug in the board and upload the code. Now you can log in to your favourite website by just pressing a button.
Note: Uploading code on ATtiny85 isn’t similar to Arduino or ESP. To upload the code first hit the upload button and wait until Arduino IDE displays a message saying “Plugin device now” and then plug in the ATtiny85.
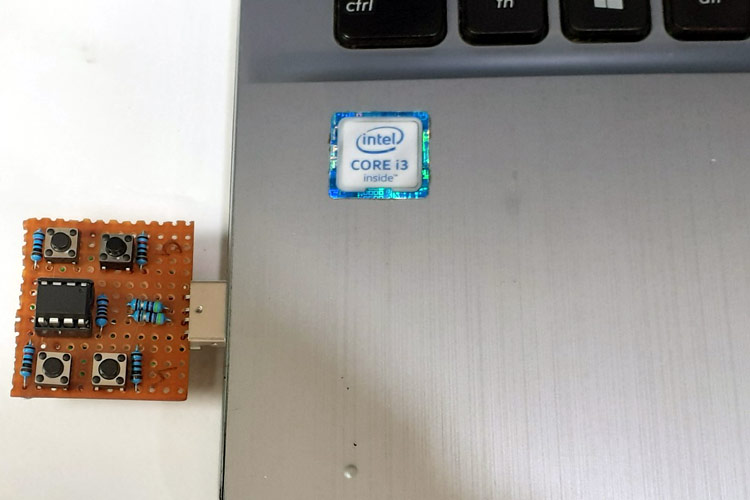
This is how you can use ATtiny85 as a Hardware security key. A working video and complete code is given below.
Complete Project Code
#include "DigiKeyboard.h"
const int windows = 2;
//const int facebook = 2;
const int twitter = 1;
const int gmail = 0;
int win_state, fac_state, twit_state, gmail_state;
void setup() {
  // don't need to set anything up to use DigiKeyboard
  pinMode (windows, INPUT);
  //pinMode (facebook, INPUT);
  pinMode (twitter, INPUT);
  pinMode (gmail, INPUT);
}
void loop() {
  win_state =  digitalRead(windows);
  //fac_state  = digitalRead(facebook);
  twit_state  = digitalRead(twitter);
  gmail_state = digitalRead(gmail);
  DigiKeyboard.print(twit_state);
  buttons();
}
void buttons()
{
   //Facebook
  /*if (fac_state == LOW){
  DigiKeyboard.delay(2000);
  DigiKeyboard.sendKeyStroke(0);
  DigiKeyboard.sendKeyStroke(KEY_R, MOD_GUI_LEFT);
  DigiKeyboard.delay(600);
  DigiKeyboard.print("https://www.facebook.com/login/device-based/regular/login/?login_attemp…");
  DigiKeyboard.sendKeyStroke(KEY_ENTER);
  DigiKeyboard.delay(5000);
  DigiKeyboard.print("Facebook Password");
  DigiKeyboard.sendKeyStroke(KEY_ENTER);
  DigiKeyboard.delay(5000);
  }*/
  //Twitter
  if (twit_state == LOW){
  DigiKeyboard.delay(2000);
  DigiKeyboard.sendKeyStroke(0);
  DigiKeyboard.sendKeyStroke(KEY_R, MOD_GUI_LEFT);
  DigiKeyboard.delay(600);
  DigiKeyboard.print("https://twitter.com/login");
  DigiKeyboard.sendKeyStroke(KEY_ENTER);
  DigiKeyboard.delay(5000);
  DigiKeyboard.print("Twitter Email");
  DigiKeyboard.delay(1000);
  DigiKeyboard.write('\t');
  DigiKeyboard.print("Twitter Password");
  DigiKeyboard.sendKeyStroke(KEY_ENTER);
  DigiKeyboard.delay(5000);
  }
  //Gmail
  if (gmail_state == LOW){
  DigiKeyboard.delay(2000);
  DigiKeyboard.sendKeyStroke(0);
  DigiKeyboard.sendKeyStroke(KEY_R, MOD_GUI_LEFT);
  DigiKeyboard.delay(600);
  DigiKeyboard.print("https://accounts.google.com/AccountChooser/identifier?service=mail&cont…");
  DigiKeyboard.sendKeyStroke(KEY_ENTER);
  DigiKeyboard.delay(5000);
  DigiKeyboard.print("Email ID");
  DigiKeyboard.sendKeyStroke(KEY_ENTER);
  DigiKeyboard.delay(4000);
  DigiKeyboard.print("Email ID Password");
  DigiKeyboard.sendKeyStroke(KEY_ENTER);
  DigiKeyboard.delay(5000);
  }
  //Windows
  if (win_state == LOW){
    //DigiKeyboard.print("Windows");
    DigiKeyboard.update(); //Get the Keboard input ready
    DigiKeyboard.sendKeyStroke(0); // Send a null keystroke
    DigiKeyboard.delay(3000);
    DigiKeyboard.sendKeyStroke(KEY_ENTER);
    DigiKeyboard.delay(2000);
    DigiKeyboard.print("1231");
    DigiKeyboard.delay(2000);
   }
}
Comments
Where is admin?
Where is admin?
It is about advertisement on your website.
Thank.
Can I contact admin??
Can I contact admin??
It is about advertisement on your website.
Regards.
Where is administration?
Where is administration?
I'ts important.
Regards.
Where is moderator??
Where is moderator??
I'ts important.
Thank.
Where is moderator??
Where is moderator??
It is about advertisement on your website.
Regards.
Can I contact admin??
Can I contact admin??
I'ts important.
Regards.
Where is administration?
Where is administration?
It is about advertisement on your website.
Thank.
Can I contact admin??
Can I contact admin??
I'ts important.
Regards.
Can I contact admin??
Can I contact admin??
It is about advertisement on your website.
Regards.
Hello! I use the arduino
Hello! I use the arduino platform IDE. It is correct to select attiny85. When I burn the code, a compilation error occurs. What is the reason? (I have imported the DigiKeyboard.h library into the IDE)
Plese explain in details that
Plese explain in details that what type of error yiu are facing.
you should not select board as ATtiny microcontrollers board. please select board as Digistump AVR boards in arduino IDE. then after that select Digispark pro 16 mHZ.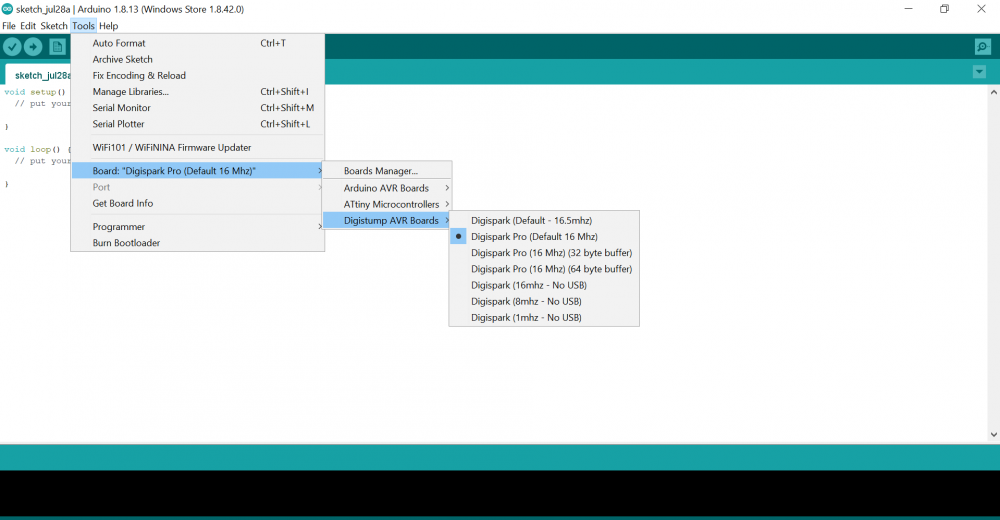


Can I contact admin??
It is important.
Regards.