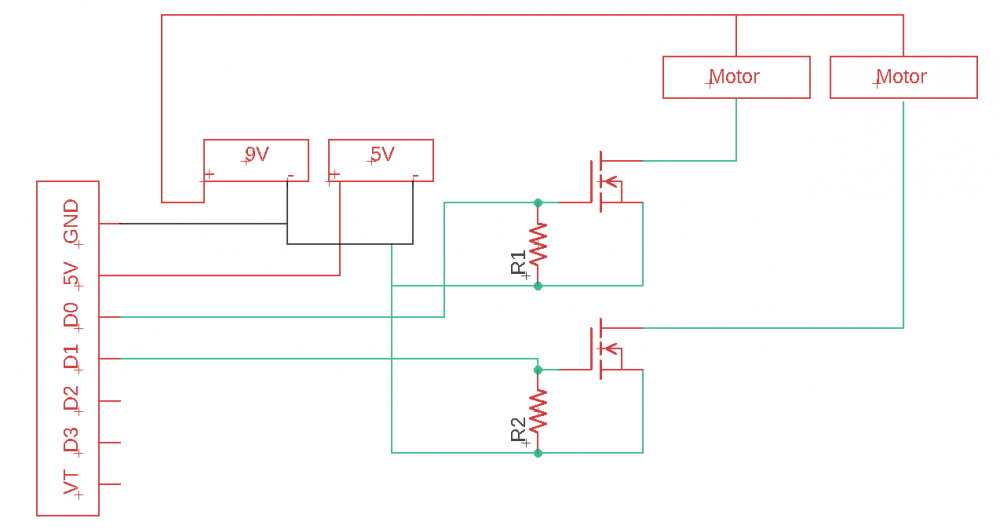
Sorry about the diagram, trying to remote control 2 motors using a YK04 receiver, powered by 5v, 100k resistor, and STP36NF061 Mosfet. 9v battery to power the motors. Think have the 1st one ok, but unsure on adding the 2nd motor.
Please any help be greatly appreciated..
Sorry. If mat trouble you once more. Never done any electrical work like this. The projects taken over 3 weeks to come up with to design the prop, then this on top. Heads in bits. So really appreciate your time taken out.
Could you be so king as to clarify a few things please?? As on the added drawing in baby terms :-)
Again appreciated
Sory for my confusing diagram,
First, you are absolutely right about the pinout of the mosfets.
Second, take a closer look at the point where the resistor R1 and the gate of the mosfet gets connected, saw a dot that means those two lines are connected. Otherwise its not connected.
Third, RED is positive, Blacks are Negative, some of the greens are negative and some are connection between components. let me explain,
The green wire coming from the source of the mosfet, has to be grounded.
The two wires from D0, and D1 gets connected to the gate of the mosfet.
I hope the image below will clear your doubts,

What type of motors you are using? if its a heavy duty one you need to add two diodes from drain to source
Hi, Strange used now 3 STP55NF06FP Transistor N Channel MOSFET. As per diagram.Was given a few receiver transmitters, when testing see which of them are working and matching them up, the mosfets failing. Using 12v N type remote battery for the receiver, a 9v PP3 to power the motor. Cant figure it,
Would then a diode be needed? if so could you please inform me if should be put on G D or source?
Thanks again
The circuit is ok but I could not see any snubber circuit for the MOTORs.
The major problem of a MOSFET that they are very sensitive when compared with Transistors. The connction with the Mosfet is need to be protected by a freewheeling diode. You can try adding single Diode 1N4007 in each Mosfet. Add the annode to the MOSFET drain and cathode to the Source. It will protect the MOSFET from failing.
This snubber circuit is absolutely unnecessary, As a freewheeling diode will be enough.
A generic 1N4007 Diode for each Mosfet would be sufficient
Yes, debasis is right. Since your circuit does not use any freewheeling diode, I checked for snubber circuit. Snubber circuit was not there, so I asked you to put a simple diode of 1N4007. Use diode rather than snubber because diode will solve the purpose and relatively cheap and simple to use.
Hello.
Again added diodes as explained. Have now tried 10 STP36NF061 Mosfets.
Mootor just runs, removed all connectors to the receiver, no difference. If have just the Drain to motor + positive. The touch the Source with the negative, motor just starts up again. Assume the mosfets are faulty?
Thanks again
Try checking the MOSFET with a multimeter, in continuty mode.
1. Connect the meter's negative (-) lead to the 'Source' of the MOSFET.
2. Hold the MosFet by the case, nad don't touch the metal parts of the MOSFET.
3. With the meter positive lead touch the MosFet's Gate.
4. Now move the positive probe to the Drain. You should get a low readin, because the internal gate capacitance of the MOSFET is now charged by the meter and the device is now ON.
Such a simple test is not 100% -- but is useful and usually adequate.
In reply to Thinking of using these now??? by BLmagic
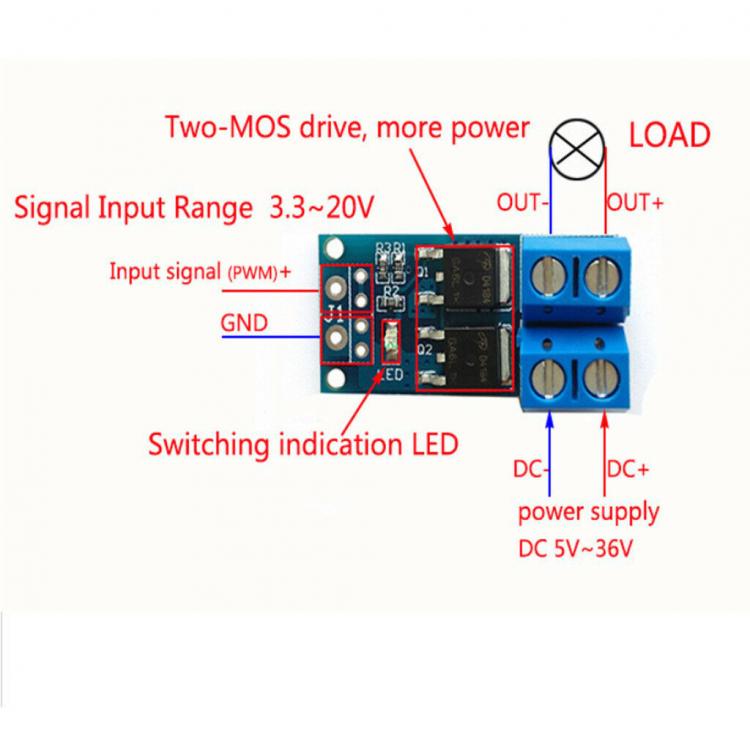
Yeah, I think this mosfet module is a good start... Check this out.
In reply to Thinking of using these now??? by BLmagic
Yeah, I think this mosfet module is a good start... Check this out.
Thank you. Just seen some magical effects that has taken me away from my usual magic. As you know electronicts is not something i have encountered. There is a few projects trying to figue out, thats a deep secrect, long past. Two of them by watching and banging head against wall have figured out. This is NOT! for profit but to learnand try to understand the mechanice. Did purchase 1 plan from a supplier, but the cost involved to post to UK, could nt relly justify. So again i much appreciate every ones feed back..
I am withing a few associates that are my magic mentors shaed my projects with them only, and have credited both the forum and those involed from this forum. Again thank you. With what i have produced has brought magic back from the early 1900`s. Long forgotten Unlike our tv Dynamo, Blain etc. I go back to the late long forgot classics as people you dont know in my feild as Slydini, a true 1900`s magician. Again thank you for time and patience
Thanks for all the help, working brilliant.
Just one question, the prop im building, requires strong maginets, have purchased 2 electromagnets, size 50mm x 20mm & 70mm x 21mm. 25 /50k pull. They do the job, but needing something lot thinner, so can be easily consealed. Seen some 70mm x 10mm, 25k pull. Sort of looking into it, read if use a flash capasitor, would inject more current giving a stronger pull? Tried looking on youtube etc. for further information but refering to coil guns etc, which i dont want.
Any help advice appreciated, Was even thinking buying some coil wire nd making own, but be waisting time effort and £££..
Thank you...
You can make your own. But you can purchase one also but it will cost a bit but time saver for you.
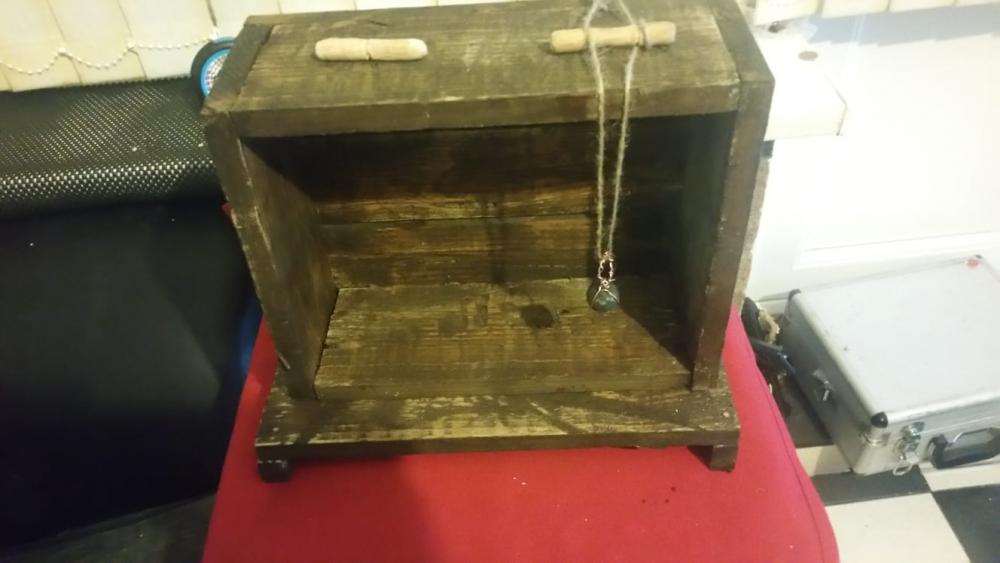
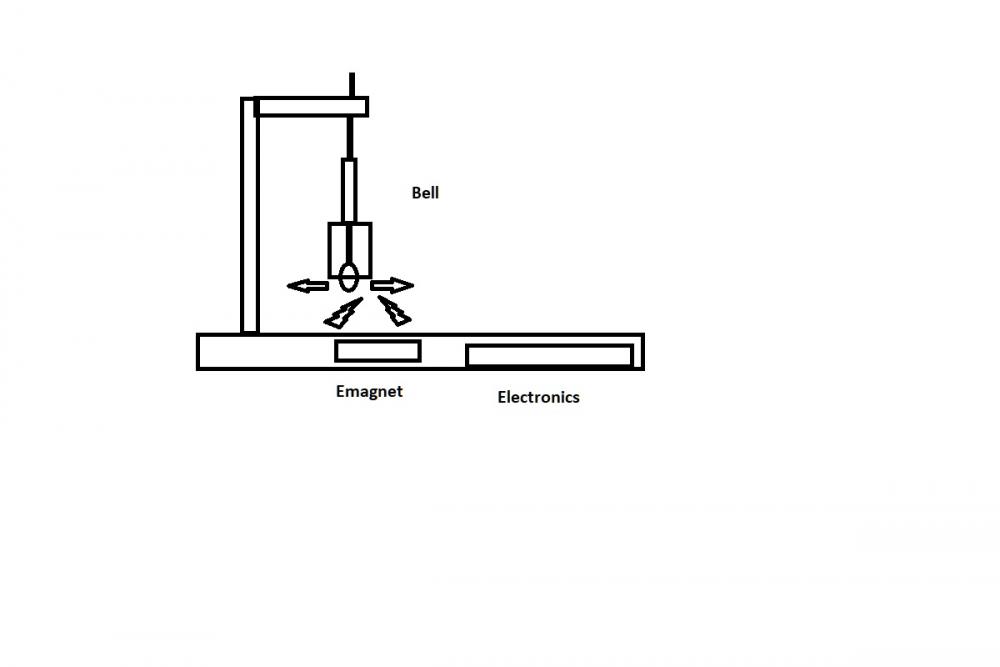
Ahhh so it is possible. As you know my electronic skills are that of a 2 yr old. Head is full of ideas, but very very limited electronic knowledge. Unable to thank you enough. Given me more information than i would ever expect. I know its a big ask and ral pushing things, the projects im trying to recreate have long gone or very rare. Not for profits but self entertainment. The simple drawing is called a spirit bell. Apply power to the electromagnet, the clanger in the bell moves side to side giving impression ringin on the call of the spirits :-), electronics and electro, hidden inside the base. I know weird :-) but as say numerous designs. Having the magnets too thick doesnt justift the size of the base etc. Hence if theres a way could reduce size of magnets but have a lot of force. Again What you said not to sure on what im looking at or a build. Baring just your standard electromagnet. The 2nd phot is of the box im building, the ball moves back and forth, banging off the back wall, also incorporating a small bell that also rings. But again struggling withthe depth...
Thank you...


Seems like retro spirit bell for hallween. Seems interesting. Wanna call some ghost?
Well, I would advice you to use a proper magnet for this one. What is the mass of the clanger? diameter? What is the available space in the basement?
Also, when you popst something that is not related to the previous posts, kindly make a new thread, so everyone could open it and help you as well.
Thought going off on another tangent, cause no interest. :-)
Still experimenting with various bells and clangers at the moment. Yes just been experimenting with sphere magnets for clangers. With the use of the electros work very well. As say Sourave, just be great if could reduce the thickness of the electromagnets but have same pulling power. But for now the few props made can justify the thickness.
I will try open a new post regarding electromagnets.
Again appreciate you comments, thank you.


Debashis Das
Joined December 02, 2019 117Monday at 10:02 PM
This is what you have to do