If you’ve received the DIY version of LiteWing, follow these simple steps to assemble your drone. No 3D-printed frame or complex tools are required. Everything fits directly into the LiteWing PCB, which also acts as the drone's structural frame. If you are completely new to LiteWing check out the LiteWing Wiki Page or watch this video on what is LiteWing Drone to learn more about our ESP32-based programmable drone development board.
Package Contents
Your LiteWing DIY kit includes:
1x LiteWing PCB (also acts as the drone frame)
4x 720 Coreless Motors
4x 55mm Propellers
2 Clockwise (CW) – Marked A
2 Counter-Clockwise (CCW) – Marked B
4x Rubber Grommets
4x PCB Legs / Stands
Tools and materials required
For assembling the LiteWing you will require some basic tools and materials that include:
Soldering Iron
Solder
Solder Flux
Wire cutter
Assembly Steps
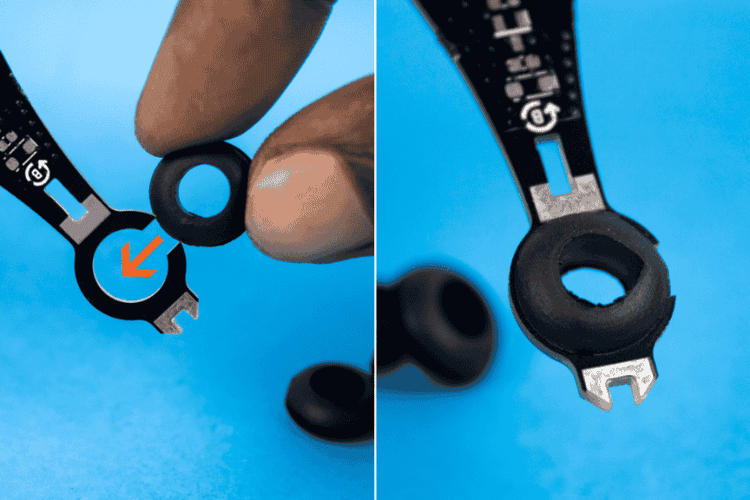
Step 1: Insert the Rubber Grommets
Gently insert the 4 rubber grommets into the motor mounting holes on the PCB. These help secure the motors and reduce vibration.
Step 2: Attach the PCB Legs/Stands
Take the 4 PCB legs/stands and align them with the slots at the corners of the PCB.
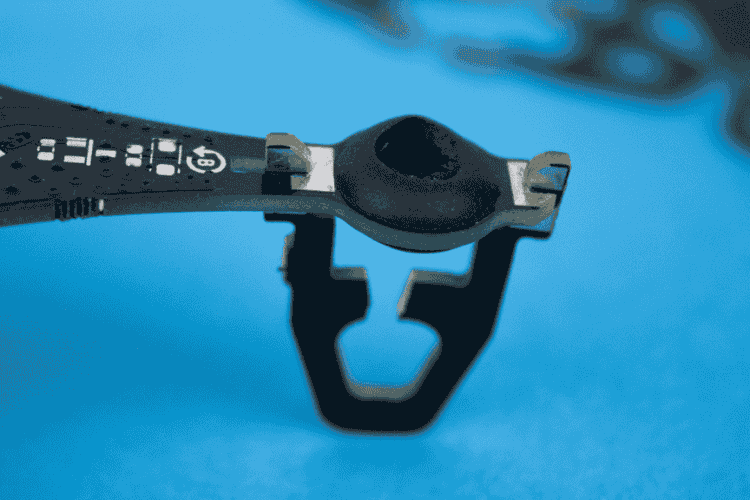
Push each leg into its respective slot until it fits securely.
Once all legs are in place, solder them to the PCB pads to make them firm and stable.
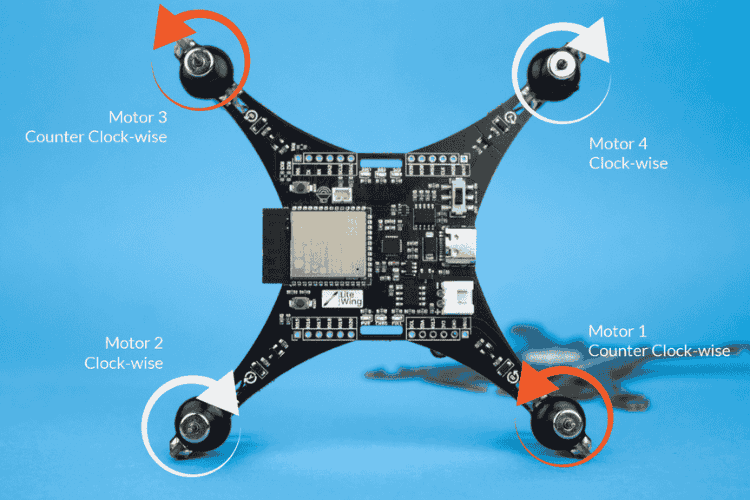
Step 3: Insert Coreless Motors into the PCB Frame
Now insert each coreless motor into the rubber grommet slots.
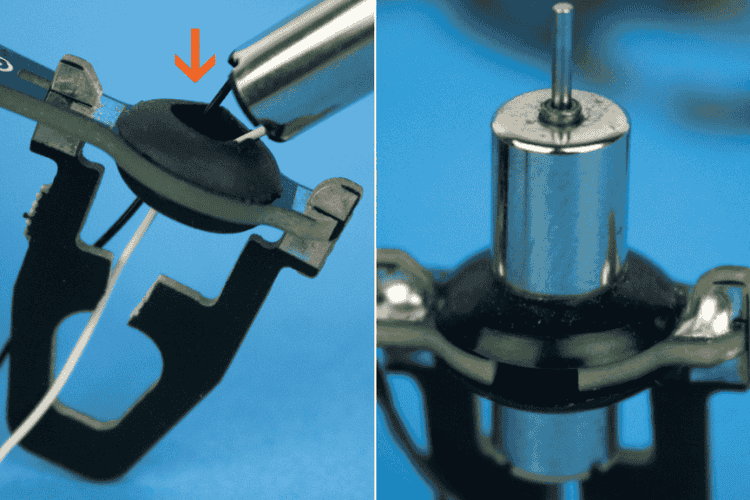
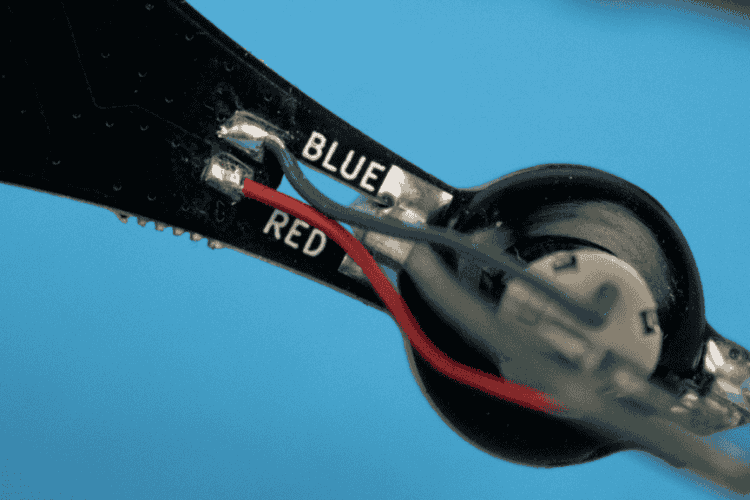
Match the motor wire colours with the wire colour markings on the bottom side of the PCB.
Make sure each motor is placed in the correct corner as per the marking.
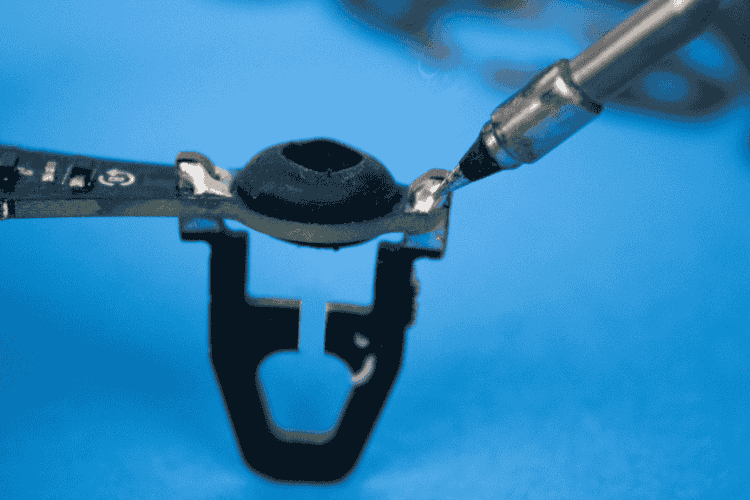
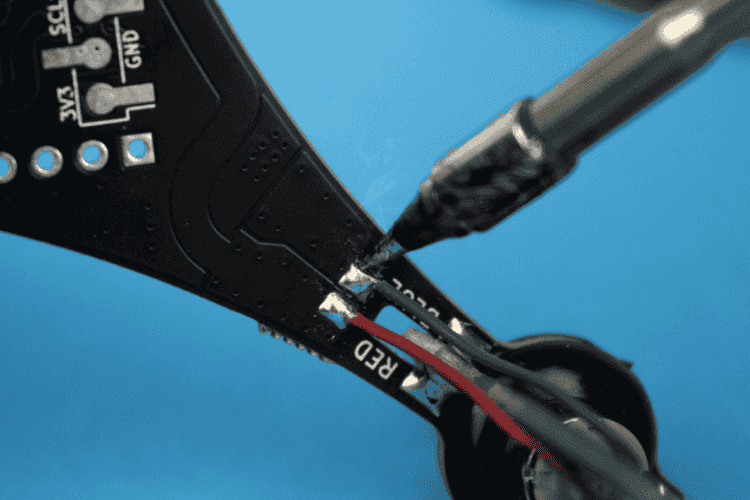
Step 4: Trim and Solder Motor Wires
Once all motors are in place:
Cut the motor wires to the proper length so they can reach the solder pads easily.
Solder the wires to the corresponding pads, as per the colour labels marked on the PCB.
Step 5: Attach the Propellers
You’ll find two types of propellers:
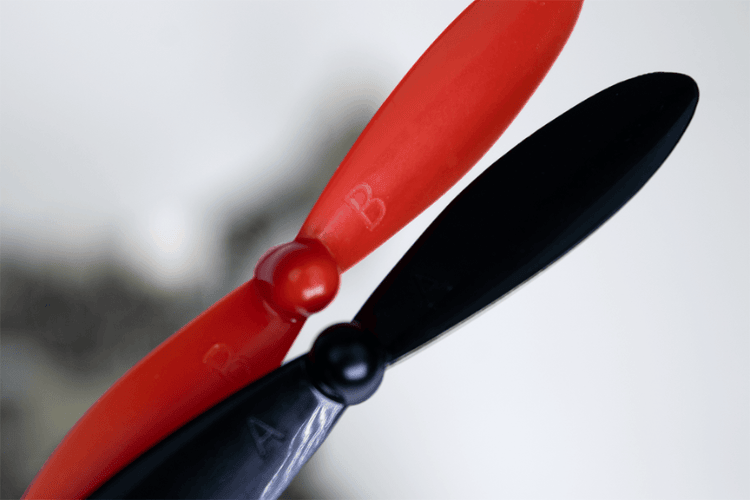
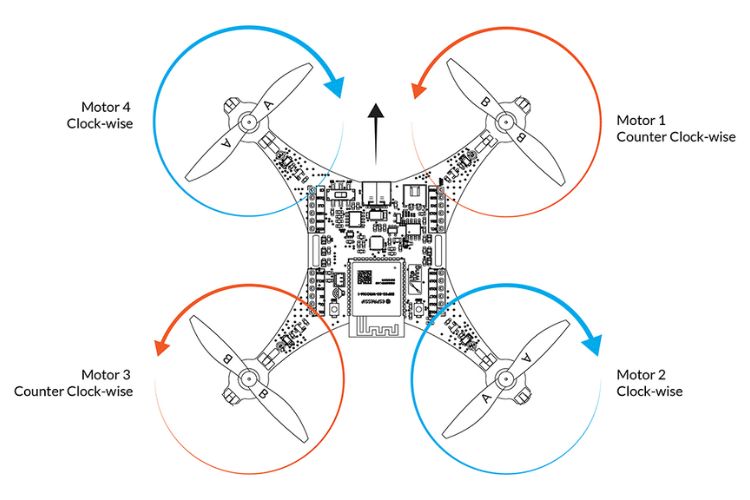
A → Clockwise (CW)
B → Counter-Clockwise (CCW)
Use the propeller markings and propeller direction labels on the PCB to install them:
Attach Propeller A to motors labeled A
Attach Propeller B to motors labeled B
Push the propellers gently onto the motor shafts until they fit securely.
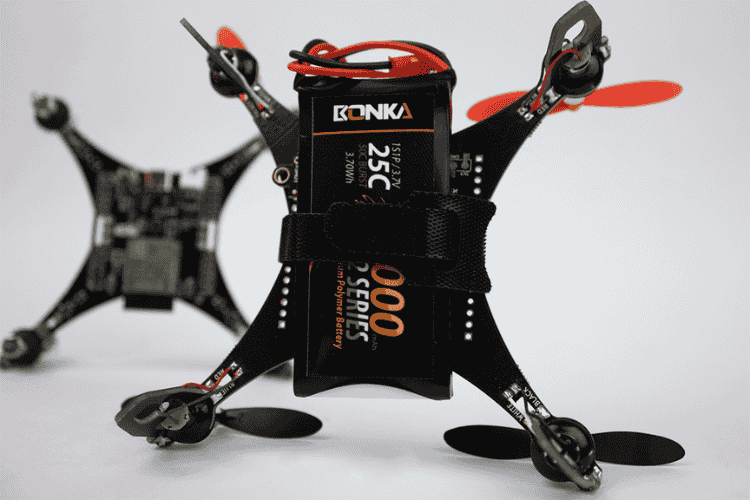
Step 6: Install the Battery
Use a Velcro tie (or hook & loop strap) to mount the battery to the frame.
You can mount the battery on either the top or bottom side of the drone, based on your preference.
Make sure the battery is secure and the wires don’t interfere with the propellers.
Tip: See the How to Select the Right Battery For LiteWing section for battery recommendations.
Assembly Complete!
You're now ready to start flying your LiteWing drone. Make sure to review the preflight check and calibration instructions before your first flight.